Pages

Showing posts with label Floral. Show all posts

Monday, June 10, 2013

SYMPATHY IN BLACK AND WHITE


What are the hardest cards to make?  In my opinion, it is a sympathy card.  Having to make a few recently,I think it is even harder when you do NOT want it to have any religious tones.  Went looking for some appropriate paper Black and White)and found some Black and Silver that I thought would work at a local big box store. 

I came across the Card Crafter's Circle challenge blog and they are having a sketch challenge similar to what I had in mind....


 and thus the card materialized:

Finished size is 5 X 7

My old standby for a sympathy card uses a die cut bird that I call a dove, however I don't have one laying around and no die cut machine, so I found these dove brads and some floral embellishments that look like lilies to me.  Also looking in the dollar bins, I found some great black and white ribbons to add.

Dollar bin finds


The ribbon is sheer and I think really beautiful. It is adhered to a piece of white cardstock and layered onto black.
 

Here it is just added to the inside of the card directly onto the white cardstock.
Heartfelt Creations sentiment


The brads were plain white, so a little glue was added to the wings along with some white art glitter.


While I was at it, I made a few more in A2 size.  One for a birthday and 2 more to have on hand.  I also made one into a thank you (not pictured).  I apologize for the quality of the picture--it was at night.


ABC Challenge - O for Open
Card Crafter's Circle - Challenge #78 Feeling Sketchy
Crafty Sentiments Designs - Black, white and one other color (silver)
Sentimental Sundays - Challenge #158 Metal Findings (doves)
Creative Moments - Challenge #18 Lots of Layers
The Hobby House - Challenge #1 Anything Goes
Make It Monday - MIM #144b with Nicecrane Designs (b) - Anything Goes

That's it for now.  I am a little behind getting this posted.  Worked all day in the yard yesterday and my body is really feeling it.  My hands are so stiff it is hard to type!  LOL.  Until the next time.........happy stamping!
Cheesy Sandy  

Friday, June 7, 2013

LEFTOVERS

Hello Bloggers,

As I told you last time, I do not have many supplies with me this summer so I brought some "leftovers" with me to use up.  Here is another card using some leftover pieces:
Toni's birthday
 
I had some glossy cardstock that was dry embossed with an embossing folder.  I used a brayer to roll ink from the Kaleidacolor rainbow ink pad called Spectrum.  Love this look which I learned from my former design teammate, Shona.  Cut to desired size and layered it on white paper.  After that it was simple!  I added the white ribbon with a thinner apple green ribbon to the middle, plus 3 half pearls.

The flowers??  Those are dollar store sticker finds!!!   (Thanks to my Florida friend, Gloria.) Yep, they are dimensional and really pretty.    And you get quite a few for $1.  What do you think????


Added a couple of the smaller stickers to the inside sentiment (Heartfelt Creations).  The writing uses a Sakura Glaze pen (these give a pretty color and sheen along with a little dimension).  Will probably be using these more this summer since I am without most of my stamps.  LOL.


Hope that this has given you some ideas!

Entering this card into the following challenges:

Challenges4Everybody - Challenge 21 - Anything Goes
Make My Monday - Use lace and/or ribbon
Inspire me Friday 106 - Anything Goes
Creative Moments - Challenge 18 - Lots of layers
Totally Gorjuss - Challenge 186 - Anything goes with flowers
TTCRD - June 4 - 10 Challenge - Anything Goes

See you next time.  It has stopped raining, so I am going to try to go and plant some of my own flowers to enjoy.

Cheesy Sandy

Saturday, February 25, 2012

MORE SOOT STAMPING

Hi Stamping Friends,
Just got finished teaching the Smokin Hot Card Class using soot stamping techniques.  I have shown you two cards previously (see Feb. 19  post below) which were masculine cards done with soot and reverse soot stamping using the Sparkle N Sprinkle Stamp Set #285 - 1900 Cars.  So I thought I'd show you the other two cards we made. 

First is color soot stamping.  For this technique you first apply water based inks to the glossy cardstock and let dry.  Then proceed as usual with sooting and stamping.  Here is the card we did using this technique:
SNS Set #316  Elements
This is a tent topper card.  I used Petite Scallop Circle Large S4-115 to cut out the sooted image of Floral butterfly circle from Stamp Set #316.  This was the class' favorite card, even though many of them came to class specifically for the masculine car cards.  LOL.

Next, we did soot stamping onto precolored glossy cardstock.  Glossy cardstock comes in many different colors, but I chose a yellowish gold thinking it would show up better with the soot.

SNS Set #160 Butterflies
This is a gate fold card with a "belt" closure around the center.  We used one butterfly stamp from the Sparkle N Sprinkle Set #160 Butterflies.

So I hope this has given you some inspiration!  I am having company coming and going for the next 2.5 weeks, so not sure how often I will get to post.  I will try to get something up at least once a week, so check on back.  See you soon!

Monday, November 14, 2011

Water Lily Birthday Card for a Challenge

I have been wanting to try some challenges from other sites for quite awhile, but usually have been too busy to even think about it.  So here is my first attempt.  This is a card that uses glitter and a beautiful cardstock to get lots of Bling! 

Water Lily Birthday Card


All stamps, glitters and embossing powders by Sparkle and Sprinkle.  Start by stamping the Water Lily 1236-234M and emboss using Silver Detail Embossing Powder EP257, then color with copic markers.  Use versamarker on the flowers then apply Sparkle Embossing Powder EP107.  Stamp Happy Birthday 1237-234A in blue ink (cover the "to you" with tape).  Next cut out the image using Spellbinders Labels Four Die S4-190 (largest), leave the die on the paper and shade with pink ink.  Add Silver Leaf Tinsel Glitter GT3004 with glue to the center of the one flower.  Use the same die and trace around the outside and cut out of turquoise paper.  Die cut the Sissix Corner Flower #2 die from Sticker paper. Remove backing and sprinkle Bubblegum Glitter G1088 over. Attach to corner as in picture
Die cut the bottom butterfly from white cardstock and the top butterfly from vellum. Leave the paper in the die and color the spots with pink Copic marker on the white paper, and use Gelly Roll Pink Star pen of the vellum. Use a Sakura glue pen on the spots on the white paper, then sprinkle with Sparkling Snow
glitter G1003. On the vellum, brush the entire butterfly with brushable glue, sprinkle on Sparkling Snow glitter. **the paper will curl—after dry bend it back into shape. When dry, attach vellum butterfly layer onto white layer using 1/8” Tear-ific Tape.
The pretty blue background was made using Cadillac Embossed Cover that you can buy here.  It is beautiful all by itself in white, but I simply added some blue dye inks with daubers until I got the color I wanted.  Simple and shiny.

I am entering this into the following challenge:
Party Time Tuesdays #41, bling it on:  http://partytimetuesdays.blogspot.com/2011/11/ptt41-bling-it-on-anything-sparkly.html

Thank you as always for stopping by to visit.
Sandy (Cheesy)

Wednesday, March 2, 2011

Glittery Stained Glass Class at SNS Shoppe

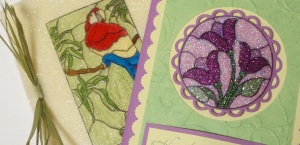
Just a quick note to let you know that I'll be doing a class on Wednesday, March 16th.  We will be doing 3 glitter-ific stained glass cards, so be prepared to use lots and lots of glitter.....oh and some glue and acetate as well.   The cards will be great to use for Easter, Mother's Day, Birthdays or whatever you can think of.

[caption id="attachment_291" align="aligncenter" width="300" caption="2 glittered stained glass cards"][/caption]

The glitter isn't showing up as much in the pictures as in real life.

Class times are 10 am - 12:30 pm; 1:30 pm- 4 pm; and 6 pm - 8:30 pm.

Place:  Sparkle N Sprinkle Shoppe, 2701 College Ave. E, Ste #7, Ruskin FL.  Maybe I'll see you there.

Its late, so that's all for now..........

Thanks for stopping by

Sandy

Saturday, February 12, 2011

Really Reasonable Ribbon and Sparkle N Sprinkle Blog Hop


Welcome! Hopefully you arrived here for the Sparkle N Sprinkle and Really Reasonable Ribbon (RRR) Blog Hop from Patti's Place and have been enjoying all the eye candy the designers have posted. If you did not arrive here via Patti's blog, you probably should head over to the Really Reasonable Ribbon Blog to get started and not miss any of the action.
I am Sandy, one of the Sparkle and Sprinkle designers, and I am delighted to be working with RRR on this blog hop. In addition to the Really Reasonable blog candy, Sparkle N Sprinkle is giving away a stamp set to one lucky blogger! Leaving a comment on every blog increases your chances of winning, because no one knows which of the artists' site has been chosen to house the prize.

On Thuesday, February 15, a name will be drawn from the comments on the mystery artists' blog. Winner gets to choose a stamp set of their choice from SparkleNSprinkle.com!
On to my creation.....I started with 2 of the ribbons from the RRR February Ribbon Kit (which has some wonderful Spring-flavored ribbons) and weaved them like a basket onto a piece of cardstock. Next, die cut the Spellbinders Label Four die from blue cardsdtock. Then trace the outside of the same die onto pink cardstock and cut out, then emboss with the Swiss Dot embossing folder .  Layer these over the weaved ribbon piece as above.


Next I stamped the large Rose 3 times from Sparkle N Sprinkle's Stamp Set #402, My Rose Garden. Color them, cut them out in various layers and pop dot them together. Under the rose first is a piece of white cotton lace trim from RRR that I colored using a dye ink pad, then a Spellbinders tag that was cut out 5 times. I used only the fancy ends of the tags, applied Brushable Glue #540 and Sparkling Snow Glitter #G1003.  I left the sentiment off so it could be added later as needed. Hope that you enjoy the card and have had a great time hopping along with us.
Next stop is the Really Wonderful Erika's blog.  Happy Spring!!!
P.S. Don't forget to leave your comments along the way.....

Thanks for stopping by,

Sandy